User Guide
Basic Information
KopiaX is a DevOps Reverse Engineering tool that allows you to generate Infrastructure-as-Code outputs in CDK, Terraform and CloudFormation from your existing resources within the initial AWS account. By making the relevant calls using the AWS JavaScript SDK, KopiaX will scan across your infrastructure and present you with the list of resources for you to choose which to generate outputs for. KopiaX is a perfect tool for cloning your existing AWS accounts in no-code or low code fashion.
Creating Stack
Locate KopiaX in AWS Marketplace. Select Continue to Subscribe.

Read the Terms and Conditions, then click Continue to Configuration.

Select the region you want to deploy KopiaX and click Continue to Launch.

Review the launch configurations and click Launch.

When you click Launch on Marketplace, it will redirect you to CloudFormation - Create Stack with existed S3 URL. Click Next.

Enter a name for the stack, select the VpcId, SubnetId that you have in your AWS account and enter your own IP address that you are going to use KopiaX application. Next.

On the third step you do not need to do anything, click Next.

Check if the Parameters are correct.

Select “I acknowledge that AWS CloudFormation might create IAM resources.” and click Create stack.

Stack creation will be completed in a couple of minutes.

Wait for stack to finish creating resources.

After stack finishes creating resources, a new EC2 instance will be created. Wait for the initialization to be completed.

While waiting for initialization, go into Instance Details and copy Public IPv4 DNS address.

Plugin
Go to kopiax.com and download the KopiaX Helper from the website by clicking Plugin button or download it from here!

In the plugin folders, go into the firefox folder.

Open “kx.js” and “manifest.json” files separately using any text editor.

In “kx.js” change EC2 Public DNS address with the one you copied from KopiaX instance. Save and close it. (Ex:”ec2-11-222-333-444.compute-1.amazonaws.com”)

In “manifest.json” change EC2 Public DNS with the one you copied from KopiaX instance and you need the add “http://“ before the EC2 Public DNS address. Save and close it. (Ex:”http://ec2-11-222-333-444.compute-1.amazonaws.com”)

Open a Firefox browser to use KopiaX. (Firefox is required for KopiaX plugin to work.)

From Application Menu click Add-ons and themes.

Click the gear icon.

Click Debug Add-ons.

Click Load Temporary Add-on...

Select “manifest.json” and open it. Plugin will be ready for KopiaX. (You need to load the plugin every time you want to use KopiaX.)

After everything is completed go to the stack and you can start using KopiaX by clicking the link in the Outputs.

Scanning
When you follow the link, you will be greeted by Introduction Page.

Click the drop-down list to select a region for KopiaX to scan for resources.

A list of available regions are visible here.

After everything is complete click Scan Account button.

Wait for the scanning to be completed.
Service Selection
After the scanning is completed, from the left side menu select the service you want to transform into IaC outputs.

After selecting the service, you can see the available components of that service.

By using checkboxes select the desired resources.
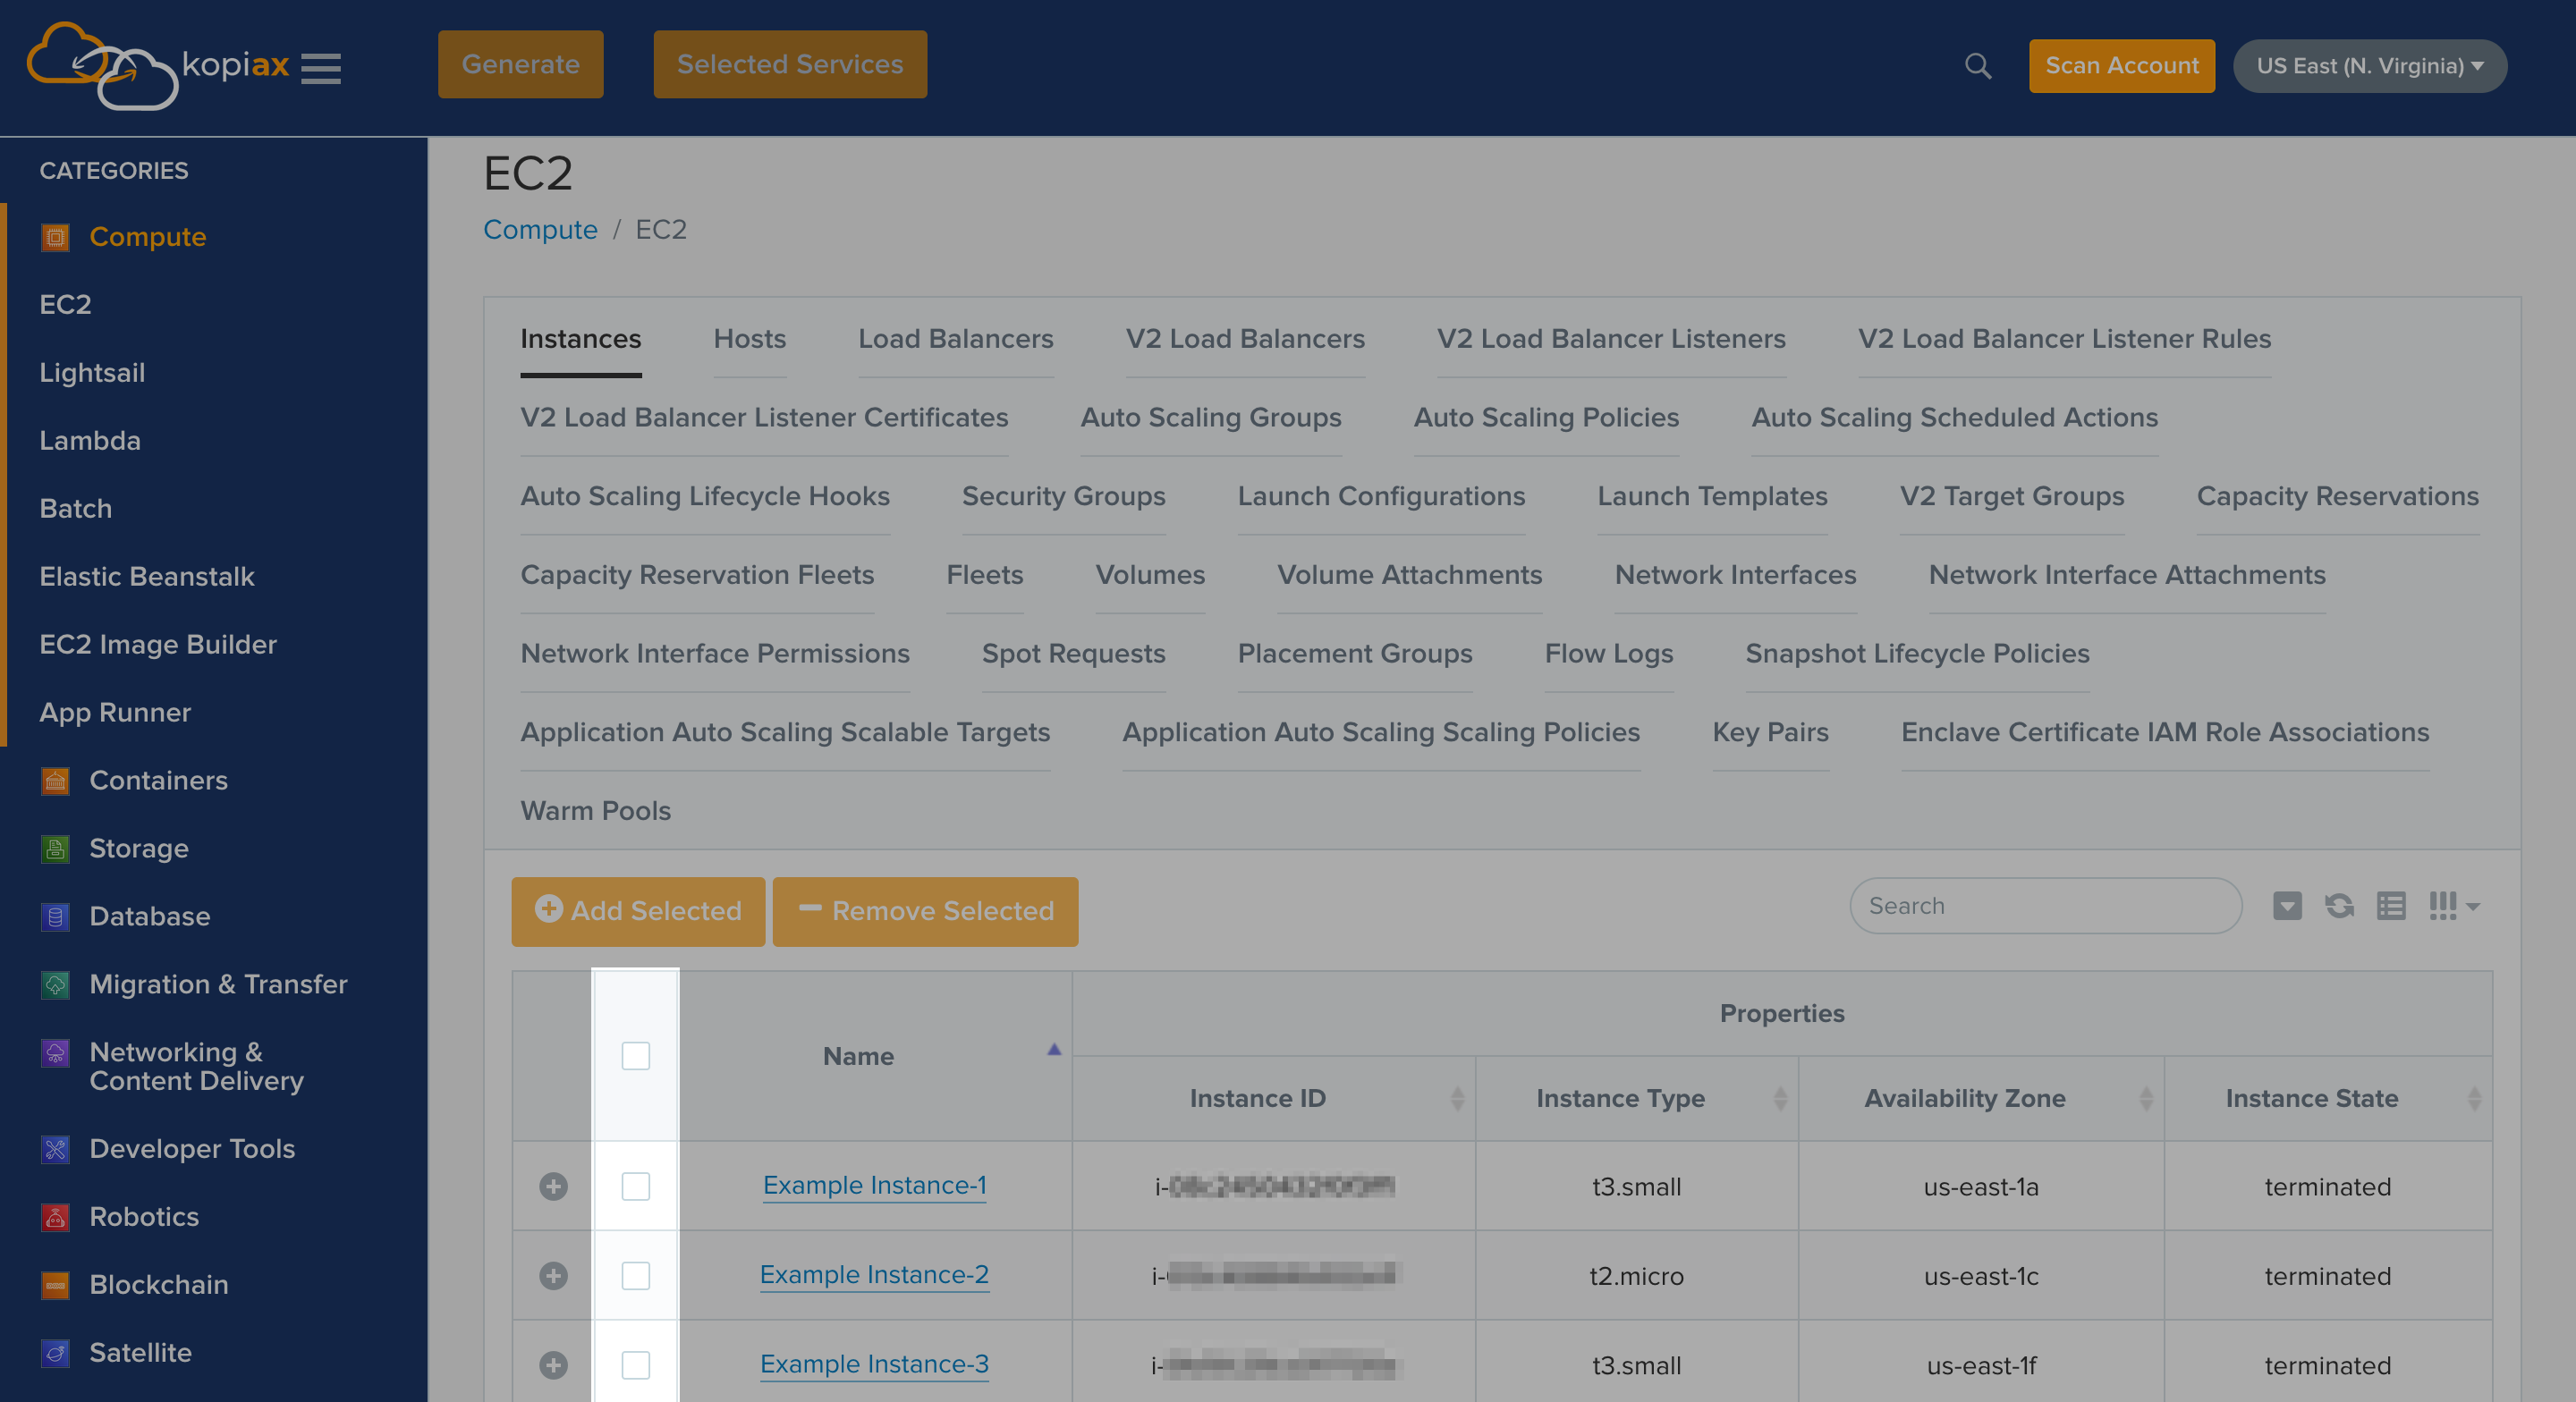
Using the buttons add or remove resources for transforming.

Click Selected Services after finishing the selection of the resources.

From Selected Services you can see all the services selected.

You can remove services one by one or remove all of them with the Remove Button. on the top row.

Generating Outputs
Click Generate when you are ready.

Generated output will be shown here.

You can select the desired output from the left side menu.
